How to grow your own food indoors, part 2: Green onions
In the second blog in our series about how to grow your own food indoors, we’ll be discussing green onions. Green onions, also called scallions, are great for adding flavor to soups, omelets, marinades, and more. We’ll show you how to grow your own green onions in less than 2 weeks!
Join us for the rest of this 3 part series on how to grow your food indoors:
Quick instructions:
1. Purchase green onions from the store or get some from a friend or neighbor. 2. Gather a cutting board and knife. Cut off the white tips of the onions where the roots are attached. 3. Stand the tips with the root-end down in a small bowl. Add enough water to the bowl so that it covers the roots. 4. Place the bowl on a sunny windowsill. Change out the water at least once a week. 5. After a few days, green shoots will begin to grow back. They will grow more and more over the next couple of days. 6. Your roots will also grow longer as the shoots grow. Once your roots are too long for their bowl, transfer them to a tall, clear jar and place them back in the sunny window. 7. When the shoots are 4 or 5 inches long, it’s time to plant them in a pot. 8. Gather soil and a pot with a hole in the bottom. Fill the pot about halfway with soil. Place the plants in the pot. Fill the rest of the pot with soil. The roots should be completely covered. 9. You can now eat your green onions! Cut off what you need and place the pot back in the sunny windowsill so it can keep growing. Be sure to continue to water the plant when the soil gets dry.
Step-by-step instructions (with pictures!):
We, the Food Talk team, grew our own green onions to help show you how to get started. Follow along below!
Grab a cutting board, knife, and the green onions that you bought from the store or got from a friend or neighbor. Cut off the white tips of the scallions.
Place the tips in a small bowl with the roots facing down. Add enough water to cover the roots. Place the bowl in a sunny windowsill.
Now it’s time to wait until the onions begin to grow back. You may even see some growth as soon as the second day!
Be sure to change the water at least once a week.
By day 4, your green onions may really start to gain their dark green color. You may have multiple shoots, as seen in the picture.
Your green onions may grow faster every day, just like ours did! Soon you will have to transfer them to a taller jar.
Once your roots are getting too long for their bowl, transfer them to a tall, clear jar and place it back in the sunny window.
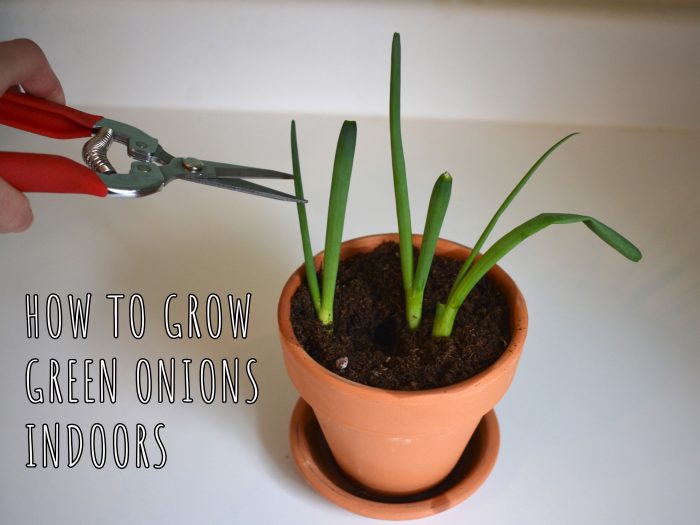
When the green onions have grown to be 4-5 inches, it’s time to plant them in a pot.
Fill a pot about halfway with soil. Then place your green onions in the pot. Fill the rest of the pot with soil so the roots are completely covered.
At this point, your green onions are ready for eating! You can cut what you need from the plant and then place it back in a sunny window so it will continue to grow. Be sure to water it when the soil gets dry!
Looking for a recipe to use your green onions in? Check out these recipes for a French spinach frittata and a yummy potato salad .
Learn more about growing plants indoors here . Having trouble growing your indoor plants? This resource can help. You can also bring your questions and photos of the plants you’re concerned about to your nearest Extension office . They’d love to help!
Written by Taylor Newman, Ph.D. Candidate | Edited by Laurel Sanville, MS, RDN, LD
Original photo sources: Taylor Newman